
Master the 3 Basics of Every Golf Swing
Golf Grip, Golf Posture & Golf AlignmentGolf is not as easy as it looks on TV.
But it also doesn’t have to be difficult either.
With the right building blocks in the golf swing. You can play better golf and enjoy the game much more.
As with anything, practicing makes you better. Golf is no different. The best part of learning and practicing golf is that you don’t have to go to a driving range. You can practice the fundamentals of the golf swing in your backyard or basement.
It may sound odd, but practicing the golf swing without hitting a golf ball will help build the fundamentals of your golf swing. Then once you go to the golf range or play golf, you will start to see improvement.
The 3 Building Blocks of the Golf Swing.
The Golf Grip. Golf Posture. Golf Alignment.
If you’ve never held a golf club, you will probably hold it wrong. This will immediately lead to a poor golf swing.
As well, if you stand over the golf ball with poor posture, this will lead to poor contact with the golf ball.
Finally, if you are not sure how to aim (align) your body and ball toward your target, golf will be very difficult.
In this article, I will outline all 3 building blocks to get you started.
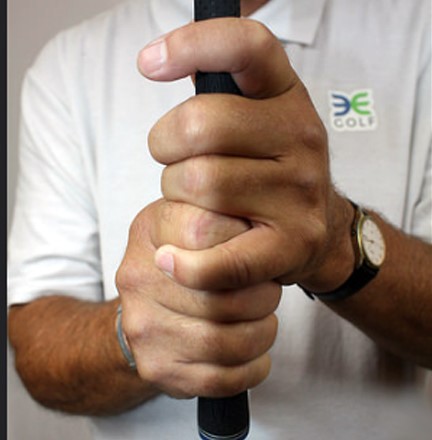
GOLF GRIP
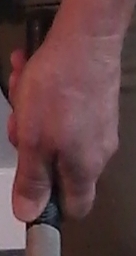
MASTER THE 3 BASICS OF EVERY GOLF SWINGThe 1ST Building Block is the Golf Grip.
GOLF GRIP
OVERLAP GOLF GRIP
INTERLOCK GOLF GRIP
Whichever is used you must:
- Practice correctly
- Practice constantly
- Practice consistently
Once you have chosen a golf grip style the next step is the HAND POSITION on the club.
There are 3 options:
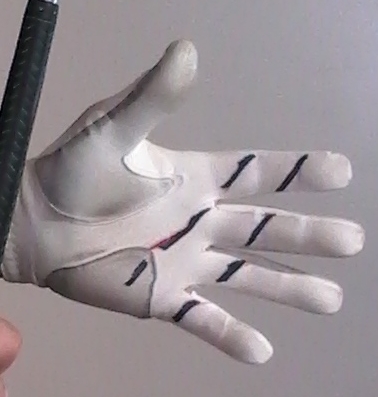
THREE DIFFERENT TYPES OF HAND POSITIONS ON A GOLF CLUB
Strong Golf Grip
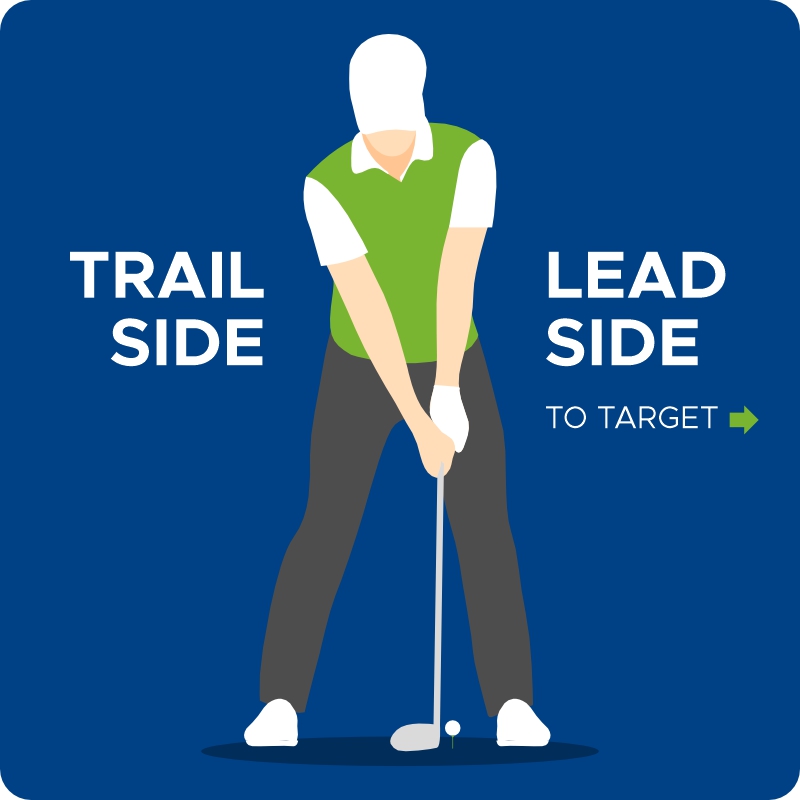
The strong grip rotates the lead hand to the trail side so the V-shaped crease between the thumb and index finger points towards the right shoulder.
This grip position will produce a flatter swing plane with the golf club generally being below the shoulder at the top of the swing.
Neutral Golf Grip
This is the most common grip used by golfers.
Both V’s of the thumb and index finger will point to the right ear and the swing plane will be standard to the shoulders at the top of the backswing.
Weak Golf Grip
This is the least commonly used among golfers but can be useful for those who generally hook the golf ball.
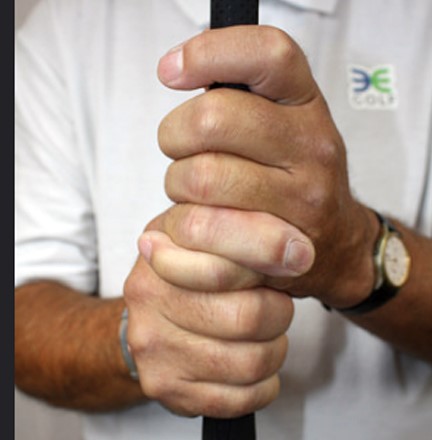
You should be able to hold the club in this hand directly in front of you and balance it with one hand.
The fat part of the thumb sits on top of the clubs shaft to provide balance and stability in the golf swing. The thumb will settle just off center on the opposite side of the applying hand (top right side of shaft for a right handed player).
The index finger will then either interlock or overlap with the opposite or trail hand.
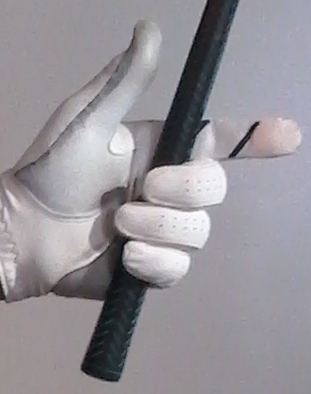
The trail hand holds the golf club with the index and ring fingers with the thumb on the opposite side to the lead hand (top left side) and the index finger simply placed under the clubs shaft.
The fat part of the trail thumb should be covering the thumb of the lead hand.
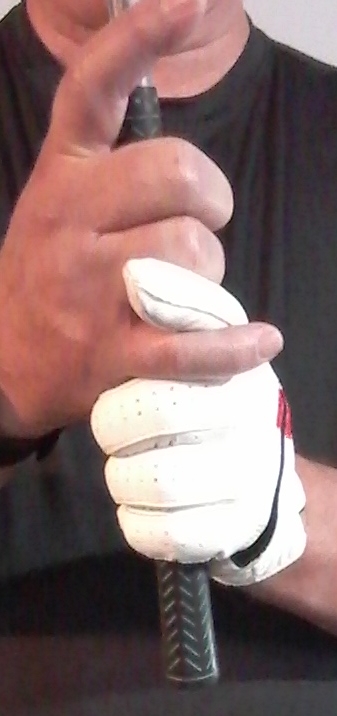
The 3 lead hand and 2 trail hand fingers are the primary holders of the golf club with the interlocking fingers providing the means to join the two hands into 1 functioning unit of hands-arms-shoulders-torso.
Which Golf Grip Should I Use?
Experiment!
Try both the Strong & Neutral Golf Grip to determine what is best for you.
Whichever you choose Remember:
Hand Position + Hand Pressure = the Golf Grip
you have to give up control to gain control
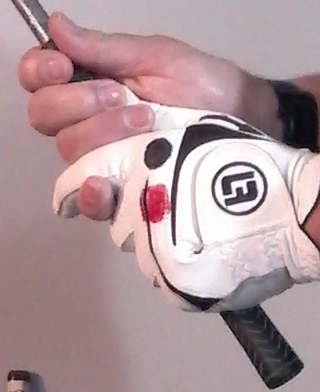
HOW TO APPLY YOUR HANDS IN THE
GOLF GRIP POSITION
The LEAD hand (the left hand for right-handed golfers) is leading the swing.
The TRAIL hand (the right hand for right-handed golfers) is following in the golf swing.
GOOD GRIP POSITON
- improves performance
- improves accuracy
- controls the clubface
DON’T OVERTHINK GOLF – KEEP IT SIMPLE
GOLF POSTURE
MASTER THE 3 BASICS OF EVERY GOLF SWINGThe 2nd Building Block is Posture.
GOLF POSTURE
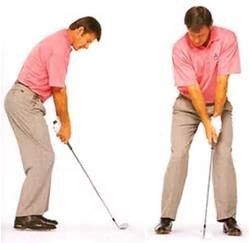
Golf Posture has 3 important components:
- Structure & Angles to the Body in the address position
- Balance at address (standing over the ball)
- Height & Distance to the golf ball
Remember: The golf swing is a combination of your body & golf club.
All the checklist items will have variations based on the club used. In our example, a 7 iron is being used.
Set-Up Check List:
- feet shoulder-width apart
- back aligned to neck naturally – not forced
- knees flex from the hip joint – not the waist
- push your rear down as in a sitting position for a chair or touching a wall
- torso tilt and rear sitting should equalize weight over the center to the back center of the feet
- hands & arms are under the chin
- both feet can point open with lateral weight more on the lead side (forward 55/45)
- shoulders tilted lower to trail side by 5-10 degrees of slope
- spine angle is also tilted to the trail side to match the shoulder tilt
- distance of the club to the ball depends on the club being used
- slight curvature of the neck but don’t have the chin tucked into your chest

As clubs become more lofted & shorter (8 iron, 9 iron, PW – Pitching Wedge, SW – Sand Wedge) posture will become more bent from the hips and the golf club will be closer to the body.
As the clubs become less lofted & longer (4 iron, 5 iron, hybrids and the driver) the body will become more upright and the golf club further from the body.
While the length of the golf clubs will change, the hand and arm position will always remain constant under the chin.
While there are lots of videos and images of posture positions available the fundamental thing to remember is the angles, height, and balance of the body must remain constant at address and during the swing.
These are CRITICAL- CRITICAL- CRITICAL to the golf swing.
GOLF ALIGNMENT
MASTER THE 3 BASICS OF EVERY GOLF SWINGThe 3rd Building Block is Alignment.
GOLF ALIGNMENT
Why Alignment is Important?
Alignment provides the means of direction for the golf ball to an intended target.
What is Alignment?
Alignment is the directional line the golf ball will travel from Point A to Point B and a corresponding body line created by shoulders-hips-knees-feet all aligned parallel to that ball line.
In golf, right-handed players always* align parallel LEFT of the target and left-handed players always* align parallel RIGHT of the intended target

Steps in Creating Alignment
- Stand behind the golf ball, about 2-5 yards and visualize your target. The target could be the flag on a green, a tree in the background, a cloud in the sky, or a bush. The target is not always going to be a flag on a green.
- Pick something in front of your ball and on the visual line you created from behind the golf ball. Draw a line from your golf ball to the point chosen in front of your golf ball. It could be a blade of grass, a dark spot, a divot or anything else that stands out to you. The line you draw is the important part so make sure it is correct to the target
- Place the bottom leading edge of your golf club at a 90-degree angle to the line drawn on the ground (square the clubface).
- Place your body parallel to your chosen ball line. Feet, Knees, Hips, & Shoulders should all be parallel to the ball line. When standing upright your body is square and it should be parallel left or right of the ball line.

A train knows the direction it is going because the tracks are aligned parallel to each other allowing the train to move safely to its destination.
In golf, the target/ball line is one side of the track and the body lines (feet, knees, hips, shoulders) are the second side of the track. It’s the only way for the golf ball to move safely to its destination and not end up in the trees or over the fence.
There are other methods to creating alignment but work on this system every time you practice. You must develop a solid routine and stick with it. If you think you are having trouble aligning properly seek help from a professional to ensure this is done correctly. It is one of the biggest and most important parts of the golf swing
Work on this system every time you practice until you develop a solid routine. If you think you are having trouble aligning contact me.
*Only if a player decides to draw or fade a shot will the normal alignment characteristics change